
I got to go to the Long Beach hair show for the first time this year!
I gotta tell you, this show was INSANE. It is a much bigger expo than IMATS is. I was honestly overwhelmed by all there was to see, do, buy, and learn there.
I simply didn't know what to do first. Even if I had been there for all three days the expo was open, I wouldn't have been able to see and do everything they offered.
The actual room where the expo hall is held (brands, booths, exhibitors, shopping) is jaw-droppingly giant. I walked in and was overwhelmed with the amount of booths there were.

I loved the atmosphere of this expo. There were beauty professionals just like me everywhere. I could feel the excitement and passion in the air.
Every corner I turned there was a different demo going on, or a celebrity hairstylist, or product giveaways. I just couldn't keep up, but boy was I in my happy zone.

I tried to pick what my favorite part of this convention was, but I couldn't settle on just one favorite thing. I LOVED the hair/nails/skin/makeup products available for purchase, I LOVED the free education that was offered, and I LOVED the demos and shows!
This is definitely a great expo to go to if you're looking for inspiration. If you are a professional makeup artist, esthetician, nail artist, or hairstylist, you will be inspired by what you see.

Okay so enough ranting about how much I loved this convention and how much you would love it too.
Let's talk about what I did there!
Unfortunately I could only afford a one-day ticket there, and on top of that I arrived late, BUT I still managed to buy some awesome products for my kit and I attended one business class.
The class I attended was "But First, Let Me Take A Selfie: The Art & Science of Instagram with Larisa Love".
The entire class focused on the importance of social media in association with marketing and branding yourself to an audience/clientele. It was taught by Nina Kovner, with help from Larisa Love.
I absolutely loved everything about this class. I learned so much, but above all I was inspired. Nina and Larisa were both extremely down-to-earth and funny. They both shared their tips on how to build a brand and a following on instagram. They talked about the importance of building that online connection with your clientele.
I can't fully describe how honored and grateful I was to be there.
Please take the time to follow Larisa @larisadoll and Nina @passionsquared on instagram. They are both such incredibly inspiring women.
You can also check out Larisa's blog at www.hairbylarisalove.com
Trust me, it'll be worth your time to follow these women.
Also, sorry for the fuzzy picture below. I had a hard time getting a good picture. Their class was jam PACKED with people that were trying to get in just to hear their wisdom.

~Haul Time~
Girl, you know I bought some stuff for my kit. The prices at professional shows like this are so much cheaper than what they would normally be sold for.
I needed more round brushes since I've been getting into blowouts lately. Plus, the handle on one of my old round brushes broke off, so I was definitely in need of some new tools. I bought this pack of three from the same makers as "The Wet Brush".

I also snagged a sample of an Argan oil hair treatment. I haven't tried it yet but I'm sure it's awesome. If you guys read my post about short hair care, http://brittkaye.blogspot.com/2014/12/how-to-care-for-short-hair.html , you would know how much I love using Argan oil for my hair.
I picked up some replacement razors for my hair razor too. I needed them, and when I saw them it was a no-brainer.

There was an area of the esthetics expo room that allowed attendees to donate a minimum of five dollars to charity, and in return they got to choose five sample-sized beauty products. I LOVE SAMPLES AND I LOVE CHARITY SO NATURALLY I JUMPED AT THE CHANCE.
I picked out a mini OPI nail polish, a color therapy styling oil (used on damp hair or mixed in with hair color for extra shine), Satin Smooth Renewal Facial Cream Cleanser, Satin Smooth Daily Moisturizer Broad-Spectrum SPF 30, and a facial scrubber for use in the shower.
I am in love with the Satin Smooth products I got. They both smell like pina coloda. I am so not exaggerating. They smell so good, just like coconut and pineapple. I also love the cleanser because it is super rich and doesn't foam. It is a cream cleanser that you work into your skin with warm water, and then rinse. The moisturizer is great because it has SPF 30, but it doesn't leave that whitish glow that a lot of sunscreen moisturizers leave. It also soaks right into my skin without leaving any sort of oily feel or residue.

And finally... definitely my favorite thing that I purchased at ISSE...
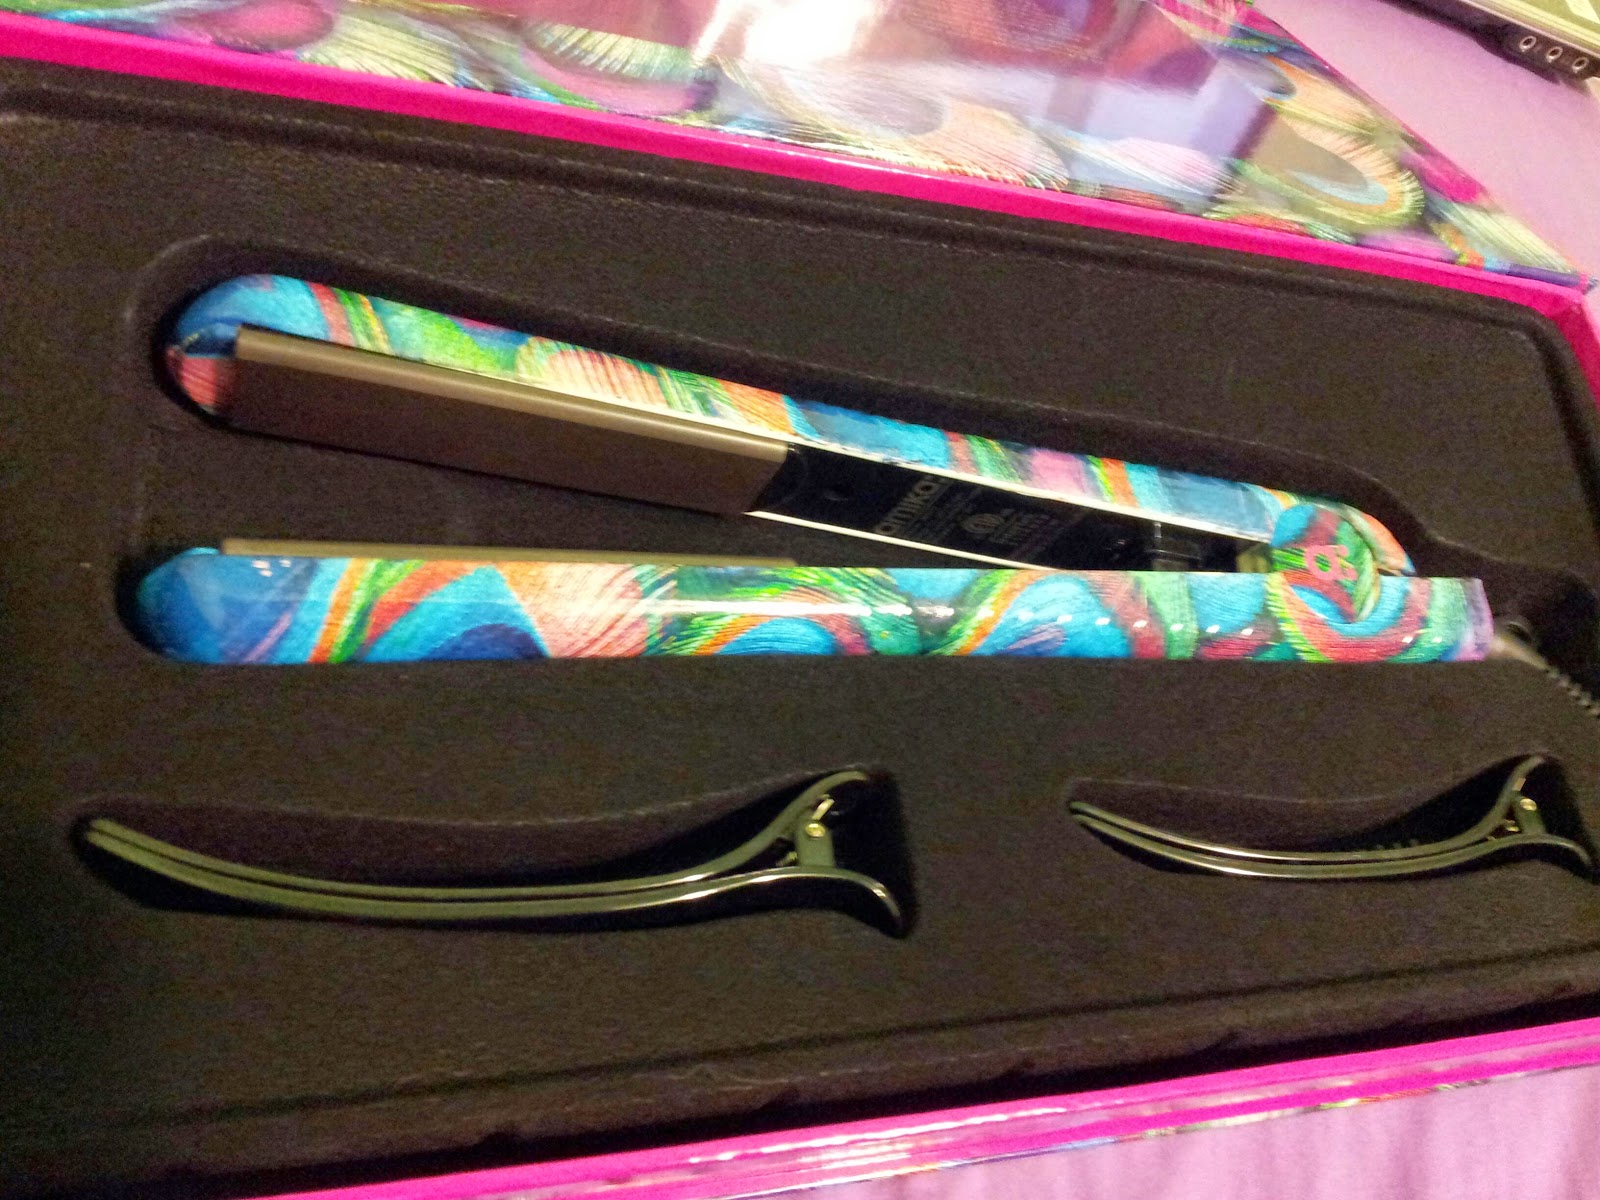
an Amika flat iron!
I've wanted one of these for so long. They are extremely versatile. You can use them to straighten, curl, or wave.

I chose the peacock print, too. They come in all sorts of colors and styles. I am one of those goofy hairstylists that enjoys personalizing every part of my kit as much as possible. So, now I have a peacock flat iron. Even my blow dryer is bright teal and sparkly. Yup.
Wrapping it up, ISSE LB was a simply fantastic experience. I learned so much, got hecka inspired, and bought some rad tools.
ISSE is an expo only open to professionals. Unlike IMATS, you need professional criteria to attend.
Much love as always,
BKL


